Thank you for purchasing your bike from Fly Rides. Today we're going to learn how to unbox your bike and have it ready so that you can take it to your local bike shop for that final safety inspection.
How to Unbox & Build Your Bike After Shipment Receipt
Opening the Box of Your New eBike
The best thing to do is to follow along to the video above! We've also included written instructions below if preferred.
First thing you want to do is cut the straps of the bike and open the top part of the box. Mind the staples so that they don’t scratch you or your bike when you’re pulling out of the box.
For extra credit remove those staples from the top of the box.
- If you see the seat post is loose go ahead and take that out first. And then there are accessory parts and bags you can take out as well.
- Now it's time to take the bike out of the box. Ideally you'd want to use a partner to take the bike out of the box, but that's not completely necessary.
- Keep the box nearby so you can put all that packaging material back in the box just in case you need to return the bike.
The Handle Bars
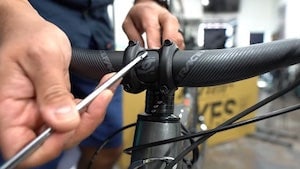
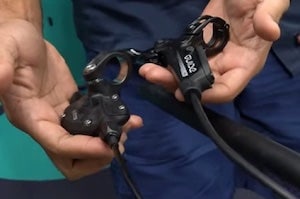
First, you’ll put the handlebar on the stem.
- Loosen the four bolts and install the handlebar.
- Make sure that the front brake housing is out in front clear of any other cable.
- When we initially install the handlebar we want to make sure that the handlebar is facing forward and as flat as possible.
Next, we're going to install the right brake lever and the shifter.
- Loosen the grip, and then remove it from the handlebar. Then slip on the shifter clamp first, and then the brake lever.
- Lastly slip the grip onto the handlebar. Some bikes use a lock nut for the grip. If yours does, use a hex wrench and get it on there nice and snug.
- Now clamp the lever and the shifter onto the handlebar. I like to stand behind the bike so I can see exactly how the lever looks and match it to the one that's already locked onto the handlebar.
The Dropper Post & Saddle
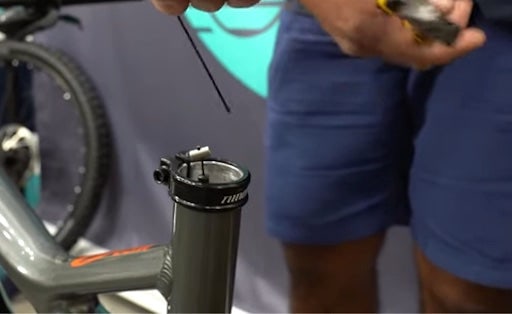
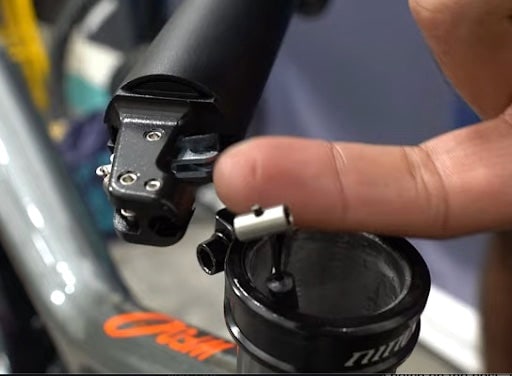
Most electric mountain bikes, especially full suspension bikes will come with a dropper post in the box.
- The dropper post lever usually comes installed on the handlebars. I like to remove it so that it's a little bit easier to install a dropper post.
- Next, remove the packaging from the dropper post, and the protective cap if it has it.
- If your dropper post cable hasn't been cut at the factory, use some side cutters and cut right up to that barrel, so you can have a nice clean actuation.
- To install the dropper, slip the barrel that's attached to the cable onto the little notch on the post. This is the actuator, and it'll allow for the dropper post to raise or lower into the body.
- For most bikes you want to pull on the cable housing as you're pushing down on the dropper post so that we can route that housing all the way out of the frame. Make sure the seat collar bolt is loose and you can begin routing the housing.
- Then, center the saddle so that it's pointing straight through the frame and tighten that bolt.
- Make sure that the remote is routed behind all the cables especially the front and rear brake cables. Then install if back on the handlebar.
The Front Wheel
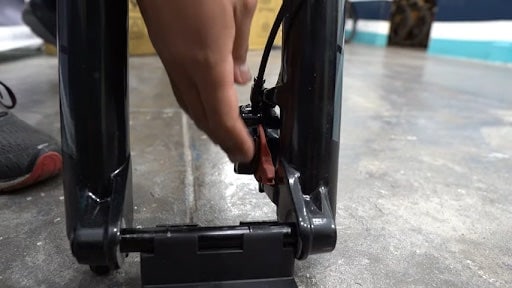
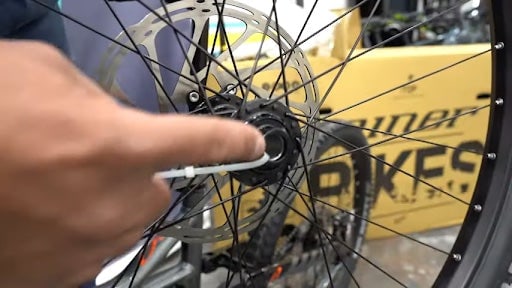
Now, we move on to installing the front wheel.
- First, we want to remove the spacer that's between the two brake pads and the brake caliper.
- I like to save these spacers because if you remove the front wheel for travel you can put the spacer right back into that caliper to prevent the pads from crushing each other.
- Next, we remove the front axle.
- Your front wheel may come with some packaging around the wheel to prevent that rotor from getting bent during travel. Go ahead and remove these, but keep in mind that the caps need to stay on the wheel.
- Make sure that the rotor goes in between the brake pads on the brake caliper, then go ahead and put that axle on there and tighten it up to spec.
- The last step from the front wheel and fork is to make sure that the cable is attached to the fork. Loosen the clamp, slip the housing behind it, and install the bolt back onto the fork.
The Rear Derailleur & Pedal Install
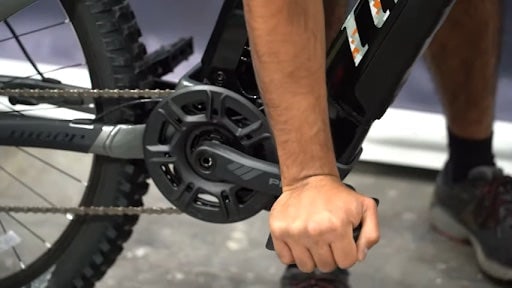
Now we want to install the rear derailleur. When you buy from Fly Rides the majority of the bikes that we carry come with either SRAM or Shimano rear derailleurs.
- If you have a SRAM derailleur, go ahead and pull that lower leg all the way out and use this locking pin to keep it from coming out. This allows you to have a lot more slack on the chain for easier installation.
- Behind the derailleur, there's this little tab. You want to make sure that this tab lands right on top of the hanger.
- Now bolt on that derailleur.
- If you have a SRAM system, make sure that this gets unlocked by pressing the cage forward and it'll unlock.
- For Shimano derailleurs, make sure that the clutch is off so it'll be a lot easier for you to maneuver the cage around the chain.
Next, we install the pedals. If you need help installing pedals, we have a cool YouTube video already out for you to enjoy. CLICK HERE
Safety Inspection
Now that we have the bike fully built, we want to do one last safety inspection. I like to start off at the front axle, move up towards the stem or the head tube, back down to the crank arms or drive unit, back up to the saddle, and finally ending up in the back.
- First step make sure that the axle is on there nice and snug.
- I also like to spin the front wheel to make sure that the brake pads aren't hitting the rotor.
- Now I come up to the top, and I'll hold on to the front brake, and I like to rock the bike back and forth. This helps me see if there's any loose parts up here at the stem.
- Go back down to the crank arms. I like to push down on this to make sure that everything is nice and tight from both sides of the bike.
- Come back up to the saddle. I like to give it a twist to make sure that the saddle and seat post are nice and tight onto the frame. While I'm up here, I like to check that the dropper post is functioning correctly.
- Now that we're down in the back, I like to give the wheel a good push make sure that everything is on there nice and tight.
- I also like to lift the wheel and make sure that the rear brake rotor isn't touching the brakes.
Now that your bike is fully built you're ready to take your bike to your local bike shop to have that final safety inspection. Thanks for buying your bike from Fly Rides, and enjoy the ride.


